Within the /content directory, there is a file named _shared.yml.
If you open it up with a text editor, you should see:
name: Name

profession: Graphic Designer

email: hi@yourdomain.com
Replace the highlighted data with your own details.
YAML file encoding
All of your .yml files should be encoded using UTF-8. In addition to ensuring no strange characters are inserted which could break Stacey’s rendering engine, this will also allow you to use special characters such as ö, — or double-byte characters such as 照 or ラ.
Any decent text editor will give you the option to edit and save your YAML files as UTF-8, so Google should be able to provide answers on how to do this with your editor of choice.
You can read more about YAML and UTF-8 encoding on Wikipedia.
Editing content
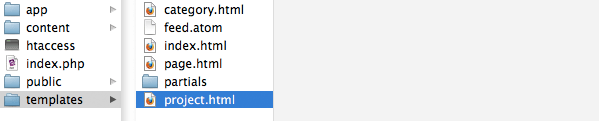
Each folder which is to be displayed as a page should have a .yml file inside it (even if this YAML file is empty). The name of the .yml file should match a template file in the /templates folder, as this is how Stacey knows which template to use to render the page. If there is no matching template file Stacey will use the default.html template file.

How variables are created:
- The browser hits http://yourdomain.com/about/.
-
Stacey reads the appropriate content file /content/2.about/page.yml.
title: About Ñame content: | Lorem ipsum dolor sit amet, consectetur adipisicing elit, sed... - Two variables are extracted from the keys and values from within the .yml file: page.title and page.content. These will be available for use within the templates.
- Stacey finds the matching template file, in this case, /templates/page.html
-
Stacey replaces the variables in the template and outputs the final html.
So this template code:
<div id="main">
  <h1>{{ page.title }}</h1>
  <p>{{ page.content }}</p>
</div>
becomes this html:
<div id="main">
  <h1>About Title</h1>
  <p>Lorem ipsum dolor sit amet, consectetur adipisicing elit, sed...</p>
</div>
Content file format
The content files all follow a standard format; each key is followed by a :, a single space and a value.
key: value
The keys match up with variable markers in the template files which get replaced with the contents of the value. You can create as many of your own keys as you need.
Keys
A key may only contain the following characters: abcdefghijklmnopqrstuvwxyz0123456789_
Essentially, lowercase latin alphanumeric characters and underscores.
Or, for the more technically inclined, anything which can be matched by the following regular expression: /[a-z0-9_]+?:/
A standard content file looks something like this:
title: The Test Project 1

date: 2009, Jun—

content: |
    Lorem ipsum dolor...
Separating Keys and Values
Each value may be followed by a blank line, or not (although the parser is forgiving of any accidental tabs or spaces).
The blank line is optional.
title:  The Test Project 1

date: ...
Empty Values
If you want one of the values to be empty, leave a space after the colon.
title:

date: ...
page.root_path
Additionally, the page.root_path variable is exposed to your content files, which is useful for linking to assets within the current folder.
It will output the relative path to the containing folder of the current page.
ie. ../content/4.projects/10.project-1/
bypass_cache
To bypass the cache for a specific page, you can add bypass_cache: true to its YAML file. Any requests to this page will no longer be cached. This is useful for pages which use randomised variables or php code.
Markdown
Any values which contain one or more newline characters (line-breaks) will be parsed as Markdown. New lines (line-breaks) must be indented by at least two spaces. Tabs are not allowed.
Within the following example, page.title and page.content will be parsed as Markdown.
This:
date: 2009, Jun—

content: |
    # Title
    Lorem ipsum.
will become:
page.date => 2009, Jun—

page.content => <h1>Title</h1> <p>Lorem ipsum.</p>
Because Markdown ignores html, if you prefer, you can use standard markup in place of Markdown. The keys and values mentioned above could just as easily be written out as:
date: 2009, Jun—

content: |
    <h1>Title</h1>
    <p>Lorem ipsum.</p>
Markdown References
Stacey uses PHP Markdown Extra which is a php-specific version of Markdown. It also adds some of its own functionality, such as fenced code blocks and header ids, so you should refer to its documentation as well as that of the original Markdown.